How Long to Boil Corn on the Cob – Exact Times for Fresh and Frozen
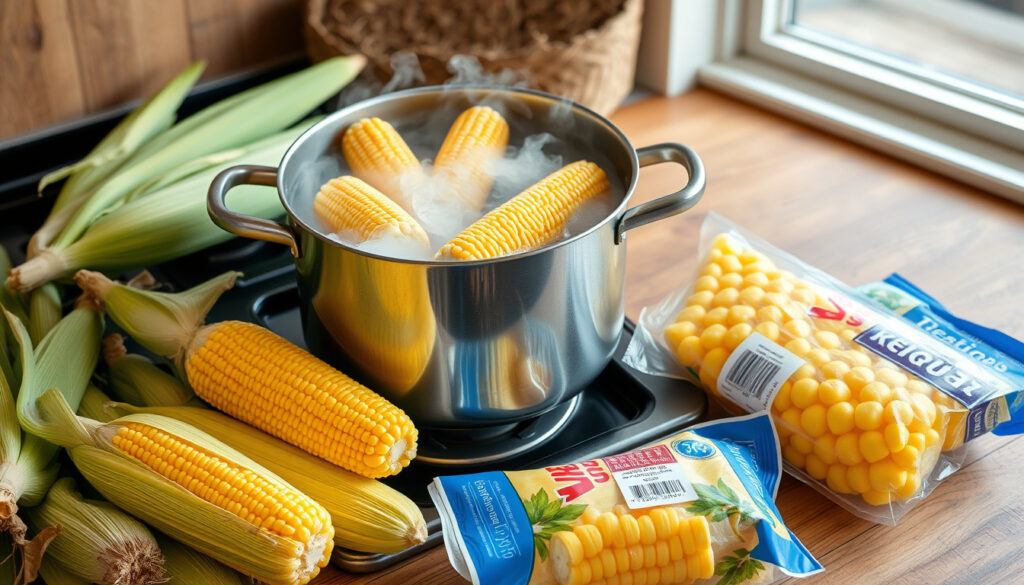
Boiling corn on the cob delivers sweet, tender kernels in minutes, making it one of the simplest methods for preparing this seasonal favorite. The cooking time depends primarily on whether you’re working with fresh or frozen corn, and understanding these distinctions helps achieve optimal results every time.
Fresh corn requires significantly less time than its frozen counterpart, with shucked ears reaching perfection in just a few minutes of boiling. Frozen corn, having been blanched before freezing, needs slightly longer to heat through and regain its texture. Testing for doneness remains essential regardless of which type you choose, as cooking times can vary based on pot size, quantity, and individual corn characteristics.
This guide covers the exact timing for different corn varieties, methods for determining when corn is cooked properly, common mistakes to avoid, and tips for achieving the best possible results in your kitchen.
How Long to Boil Corn on the Cob?
The exact boiling time varies depending on the type of corn you’re preparing. Most sources agree that fresh shucked corn needs 3-5 minutes in actively boiling water, while frozen corn typically requires 5 minutes after the water returns to a boil. These times assume the husks and silks have been removed before cooking.
Quick Reference: Boiling Times by Corn Type
Key Insights for Perfect Boiling
- Boiling preserves the natural sweetness of fresh sweet corn better than other cooking methods
- Salt should not be added to boiling water, as it can toughen the kernels
- At altitudes above 3,000 feet, add 1-2 minutes to standard cooking times
- Use a large pot that allows corn to sit in a single layer without stacking
- Maintain a strong simmer or rapid boil throughout cooking
- Boil uncovered once water returns to boiling to prevent mushy texture
Boiling Time Comparison Table
| Corn Type | Boiling Time | Special Notes |
|---|---|---|
| Fresh shucked | 4-5 minutes | Start timing when water returns to boil |
| Fresh unhusked | 8-10 minutes | Trim silk before boiling, peel husks after |
| Frozen shucked | 5 minutes | After water returns to boil; test earlier |
| Frozen with husk | 10+ minutes | Not recommended; remove husk first |
| Blanched for freezing | 3-4 minutes | Pre-freezing preparation step |
| Cold start method | 1-2 minutes | Submerge in cold water, bring to boil |
| High altitude fresh | 6-8 minutes | Add 25% time at 3,000+ feet elevation |
| Large ears | Add 1-2 minutes | Test center kernels for tenderness |
How to Know When Corn on the Cob Is Done Boiling
Determining doneness requires a simple physical test rather than relying solely on timing. The most reliable method involves poking a kernel with a sharp knife or fork—if the kernel bursts easily and appears tender, the corn is ready. Kernels should be hot throughout, tender when bitten, and display a vibrant yellow color rather than a dull or faded appearance.
For frozen corn, begin checking at the 5-minute mark since cooking times vary based on the quantity being prepared and the size of your pot. Some sources specifically recommend testing earlier for frozen varieties to avoid overcooking, which leads to mushy, unfavorable texture. pipandebby.com emphasizes that the kernel burst test works particularly well for frozen corn, providing immediate feedback on readiness.
Signs of Properly Cooked Corn
The ideal boiled corn exhibits several visual and textural characteristics. Kernel color should be bright and uniform, with no gray or translucent spots. The kernels should feel firm yet yielding when pressed gently, not hard or spongy. The overall appearance should look plump and hydrated rather than shrunken or wrinkled.
Overcooking remains the primary risk when determining doneness. Corn cooked beyond 5 minutes begins losing its firm texture and sweet flavor, becoming increasingly mushy. bakedbree.com notes that cooking longer than necessary directly reduces firmness and creates an unpleasant eating experience. This is especially true for frozen corn, where exceeding recommended times produces noticeably inferior results.
Test multiple kernels from different parts of the ear, including the center where heat takes longest to penetrate. If center kernels pass the burst test, the entire cob is ready.
Should You Boil Corn on the Cob with Husk On or Off?
The general consensus among cooking sources favors removing husks before boiling for several important reasons. Husks can harbor silk that clings stubbornly to kernels, and cooking with husks intact often results in uneven heat distribution. loveandlemons.com notes that no reliable sources specify consistent timing for husks-on boiling, making proper preparation difficult.
If you prefer the visual presentation or easier grip that husks provide, a hybrid approach works well. Peel back the husks to remove silks, then pull the husks back up around the corn while cooking. This keeps the traditional appearance while allowing direct heat contact with the kernels. Alternatively, steaming corn in its husks produces similar results with better control over the final texture.
Water Amount and Preparation
The amount of water matters significantly for successful boiling. Fill your pot halfway or enough to fully submerge the corn in a single layer—typically 4 quarts of water for four ears of corn. Stacking corn causes some ears to cook faster than others, resulting in uneven doneness across the batch.
Avoid adding salt to the boiling water. Multiple sources including loveandlemons.com confirm that salt toughens the kernels and husks, creating a less appealing texture. Instead, season the corn after cooking with butter, salt, and pepper to taste. One popular variation adds 2 tablespoons of chicken bouillon and 4 tablespoons of butter directly to the boiling water for enhanced flavor throughout the kernels.
Never add salt to boiling water for corn—it makes kernels tough and chewy. Season after cooking instead for the best texture and flavor.
Step-by-Step: How to Boil Corn on the Cob
Successful corn boiling requires minimal equipment but attention to a few critical details. Choose a large pot that accommodates corn lying flat without crowding. Select fresh corn with vibrant yellow kernels, heavy feel in hand, and no visible gaps where kernels have missing rows. bakedbree.com emphasizes these quality indicators as key factors in achieving the best final results.
The Boiling Process
Begin by filling your pot with enough water to fully submerge the corn—you’ll need roughly one quart per ear of corn for proper coverage. Bring the water to a rolling boil over high heat. While waiting, shuck the corn completely, removing all husks and silk. Rinse briefly to remove any remaining silk strands.
Carefully place shucked corn into the boiling water, ensuring it lies flat and doesn’t overlap with other ears. Maintain a strong simmer or rapid boil rather than a gentle rolling boil, as this cooks the kernels evenly without breaking them down excessively. Cook for 4-5 minutes for fresh corn or 5 minutes for frozen corn after the water returns to boiling. For more information on how to boil corn, check out とうもろこしを茹でる時間.
Remove the corn using tongs and serve immediately with butter, salt, and pepper. If you must hold the corn before serving, leave it in the hot water with the heat turned off—this keeps it warm without continuing to cook the kernels. loveandlemons.com recommends this holding method to preserve texture until serving time.
Tips for Best Results
- For frozen corn, blanch fresh ears 3-4 minutes before freezing to preserve juiciness
- Serve immediately for best texture—boiled corn does not hold well
- Use 1 tablespoon of butter per ear as a basic serving guideline
- Maintain the boil uncovered once water returns to temperature
- Test from the center of the cob for most accurate doneness reading
Compound butter works wonderfully on boiled corn. Mix softened butter with herbs like chives, cilantro, or lime zest for an elevated side dish that complements any meal.
The Boiling Timeline: Minute by Minute
- Prep work (2 minutes) – Shuck corn completely, removing all husks and silk. Rinse to remove any remaining strands.
- Water heating (5-10 minutes) – Fill pot halfway with water and bring to a rolling boil over high heat.
- Submerge corn (1 minute) – Carefully lower corn into boiling water, ensuring single-layer placement.
- Active boiling (4-5 minutes) – Maintain rapid simmer with pot uncovered. Fresh corn needs 3-5 minutes; frozen needs 5 minutes after water returns to boil.
- Doneness testing (1-2 minutes) – Remove corn and test kernels with sharp knife. Center kernels should burst easily when poked.
- Serving (immediate) – Add butter, salt, and pepper. Serve hot for best texture and flavor.
What We Know vs. What Remains Uncertain
| Established Information | Information That Remains Unclear |
|---|---|
| Fresh shucked corn requires 3-5 minutes of boiling | Specific timing for husks-on boiling is not well documented |
| Frozen corn needs 5 minutes after water returns to boil | Exact nutritional values vary by corn variety and growing conditions |
| Salt toughens kernels; season after cooking instead | Optimal water temperature for maximum sweetness retention |
| Overboiling causes mushy texture; limit to 5 minutes maximum | Precise altitude adjustments beyond general 25% increase |
| Test doneness by poking kernels; they should burst easily | Best storage duration for pre-cooked corn before quality degrades |
| Boil uncovered to prevent mushiness | Impact of corn size variation on cooking time calculations |
The Science Behind Boiling Corn
Boiling heats corn kernels rapidly to tenderness while preserving their natural sugars—a key advantage over dry-heat methods that can caramelize the sugars too quickly. The moisture-based cooking process keeps kernels plump and hydrated without excessive starch breakdown. loveandlemons.com explains that the brief exposure to boiling water maintains the sweet flavor profile that makes fresh corn so desirable.
The rapid boiling method specifically helps maintain texture by minimizing the time kernels spend at high temperatures. Slow cooking causes sugars to convert to starch more rapidly, resulting in less sweet, more starchy corn. This is why timing matters—longer exposure means more sugar conversion and a less appealing texture.
Freezing fundamentally changes the corn’s cooking requirements. The blanching process that corn undergoes before freezing halts enzyme activity that would otherwise degrade quality. When you cook frozen corn, the prior blanching means the kernels have already undergone partial cooking, requiring less time to reach serving temperature while still maintaining good texture.
Sources and Expert Recommendations
“Boiling heats kernels quickly to tenderness without breaking down starches excessively, preserving sweetness in fresh sweet corn.”
— Love and Lemons
“Start checking at 5 minutes for frozen corn, as times vary by quantity and pot size.”
— Pip and Ebby
“Overboiling leads to mushy, unfavorable texture—limit to 5 minutes maximum for frozen corn.”
— Baked Bree
For food safety guidelines, the USDA recommends ensuring vegetables reach appropriate internal temperatures and are cooked thoroughly. The USDA food safety guide provides additional context for safe vegetable preparation methods. The National Center for Home Food Preservation offers detailed instructions for freezing corn at home while maintaining quality and safety.
The FDA safe cooking guidelines provide additional recommendations for vegetable preparation that complement these timing-specific instructions.
Summary
Boiling corn on the cob successfully requires understanding the key timing differences between fresh and frozen varieties. Fresh shucked corn needs 3-5 minutes in boiling water, while frozen corn requires 5 minutes after the water returns to a boil. The doneness test—checking whether kernels burst easily when poked—remains the most reliable indicator of proper cooking, regardless of the type used.
Avoid common mistakes such as salting the cooking water, stacking corn in the pot, or exceeding recommended cooking times. Season after cooking for best flavor and texture. If you need to convert measurements for other recipes, check out our guide on 1 Gallon En Litre for helpful kitchen conversions. For more Best Spatzle with Cheese Near Me recipes and related guides, explore our other cooking resources.
Frequently Asked Questions
Do you add salt when boiling corn on the cob?
How much water do you need to boil corn on the cob?
Can you overboil corn on the cob?
How long does it take to boil frozen corn on the cob?
Should you boil corn with the husk on or off?
How do you know when boiled corn is done?
What is the calorie content of boiled corn on the cob?
How do you store leftover boiled corn?
Does altitude affect corn boiling time?
How can you enhance boiled corn flavor?
More related posts
 What Does Collate Mean When Printing? Complete Guide
 Montpetit et Fils Avis de Décès Valleyfield: Guide
 Spaghetti and Meatballs Recipe – Homemade from Scratch
 Levi’s Jeans: 501 vs 505 vs Ribcage Fit Guide
 Do a Barrel Roll: Google Trick & Real Aviation Facts
 Canada Benefit Cheques Nov Dec 2026: Dates & Eligibility
 Jean Coutu Mont Laurier – Hours, Address & Services
 Weather Tomorrow in Ireland: Dry Sunny Met Éireann Forecast
